
The Latch has partnered with Suncorp Bank to deliver sustainability content that helps our readers drive positive action in their everyday lives.
Similar to composting, keeping a worm farm can feel like a mountain that’s not worth climbing. But there are a few tricks that can help you revive a long-neglected worm farm and help you keep it going long-term.
Keeping a worm farm is a simple way of converting household food scraps into nutrient-dense fertiliser for your garden, which helps to improve the quality of your soil and therefore anything you grow in that soil. There are a few different types of worm farms you can create, but regardless of which you choose, the benefits of keeping one are plenty.
Worm farms help to reduce household waste and stop food scraps and other organic matter from ending up in the trash and landfill, where they usually break down in a less eco-friendly way.
But like many things in life that start with good intentions, the day-to-day can get in the way, tripping up your plans to stay sustainable. In those moments, we often turn to TikTok to help us troubleshoot the things that found their way into the too-hard basket, and that’s where we collected these tips for how to revive a neglected worm farm.
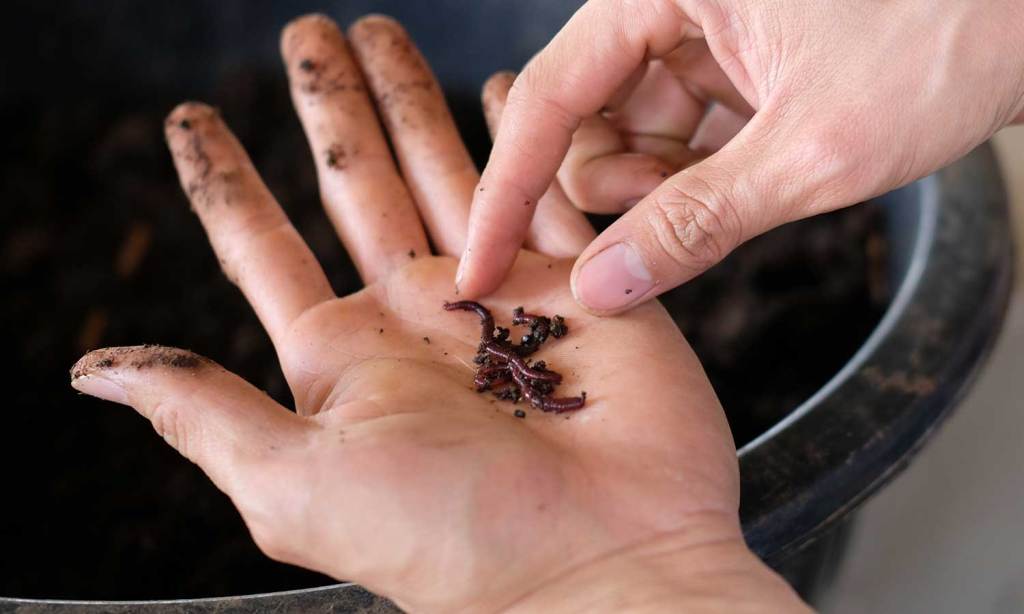
Survey the Damage
First up, look at what you’re working with. This means, analysing the bin to see if there are any worms left or worm castings (this is the fertiliser) left. Worms are sturdy and clever creatures, so they could be lurking at the bottom of the barrel or behind some of the food scraps. If you find some worms still crawling around, your worm farm isn’t as far gone as you may have thought, and this means you can revive their living conditions.
Clean the Bathroom First
The worm farm structure is usually divided into three parts stacked on top of one another. The top tray is the kitchen, then you have the bedroom below it, and then the bathroom. Take the bottom two sections — the bathroom, where all the worm poo is, and the bedroom — and bury the matter in your garden before giving them both a good rinse.
Re-stack the bedroom and bathroom parts of the structure and set aside the kitchen (this is where most of the revival will happen).
Remove Old Food Waste
You may notice that some of the well-intentioned food waste has not broken down, like egg shells or other household scraps. Remove anything that would be more difficult in the decomposition process, like those egg shells, as this takes a long time to decompose and will not be helpful in breathing new life into your worm farm.
Related: How You Can Compost Your Scraps At Home — Even in an Apartment
Make the Bed
Getting the base right and ensuring good moisture levels (that aren’t too wet or too dry) and the optimum pH is crucial to a worm farm’s ability to bounce back. Instead of playing around with making the perfect formulation from scratch, pick up a bedding block from your local hardware store. When you add water to the block, it will expand and get kind of fluffy (ideal for the worm farm), which makes it easy to distribute over the base of the bedroom level. Important: It should be wet but not soggy.
Wait to Add Food Scraps
Don’t get too excited about the freshness of your worm farm, and give it some time to do its thing. After a week of allowing the starter block to sit, and once any funky smells or bugs have evacuated, you can start to add food scraps again, starting with things that break down more easily, like vegetable peels, coffee grounds, tea bags, etc.